Install a collaboration server at a local location
For network security reasons, you may be unable to connect to the servers that we provide. This section describes how to meet the requirements if you encounter this issue.
Our technology is based on Photon Server, which is the official Unity partner for network gaming services.
To meet the requirements, you must install Photon Server on your network, on premises. You can install Photon Server in two ways:
- On a local machine, that is, on your computer or on another one. The machine must be but accessible to other computers on the same network.
- On a dedicated server. The server can be a cloud server.
Photon is originally categorized as a video game technology. For this reason, you may have to ask your administrator to open network ports. Read more about the list of ports to open.
Install Photon Server at a local location
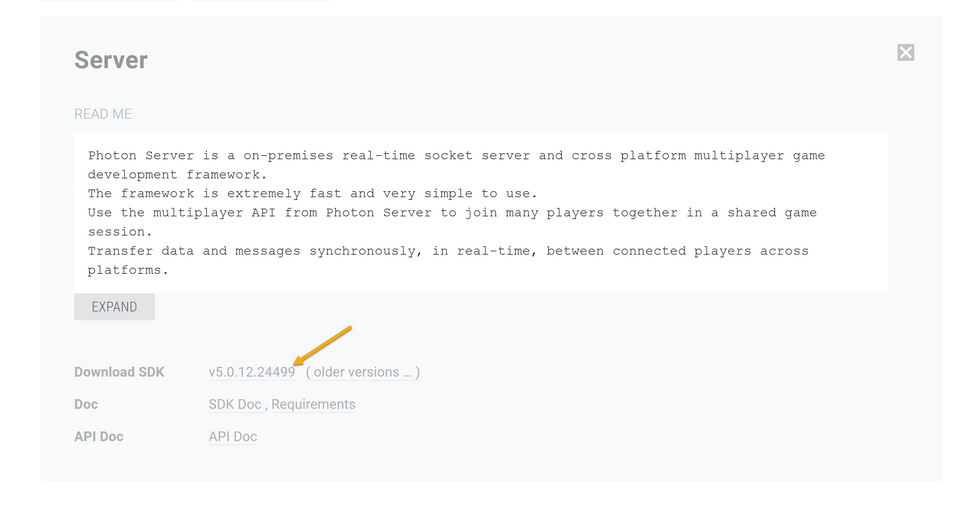
To install a test collaboration server on a local computer, follow this steps:
- Download the executable file from this location.
Alternatively, if this location is not accessible, download the file from the Photon documentation.
You may have to create an account if you don’t already have one.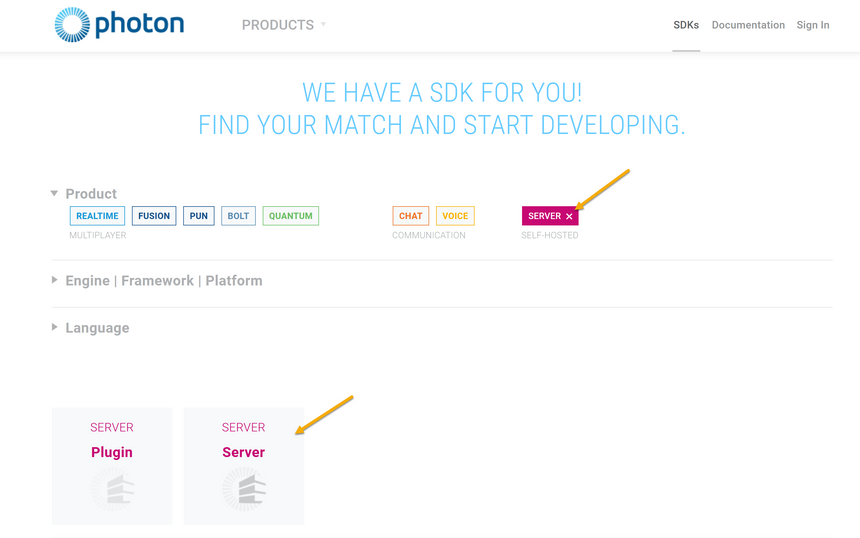
- Open the downloaded archive.
The archive is named photon-server-sdk_v****.zip.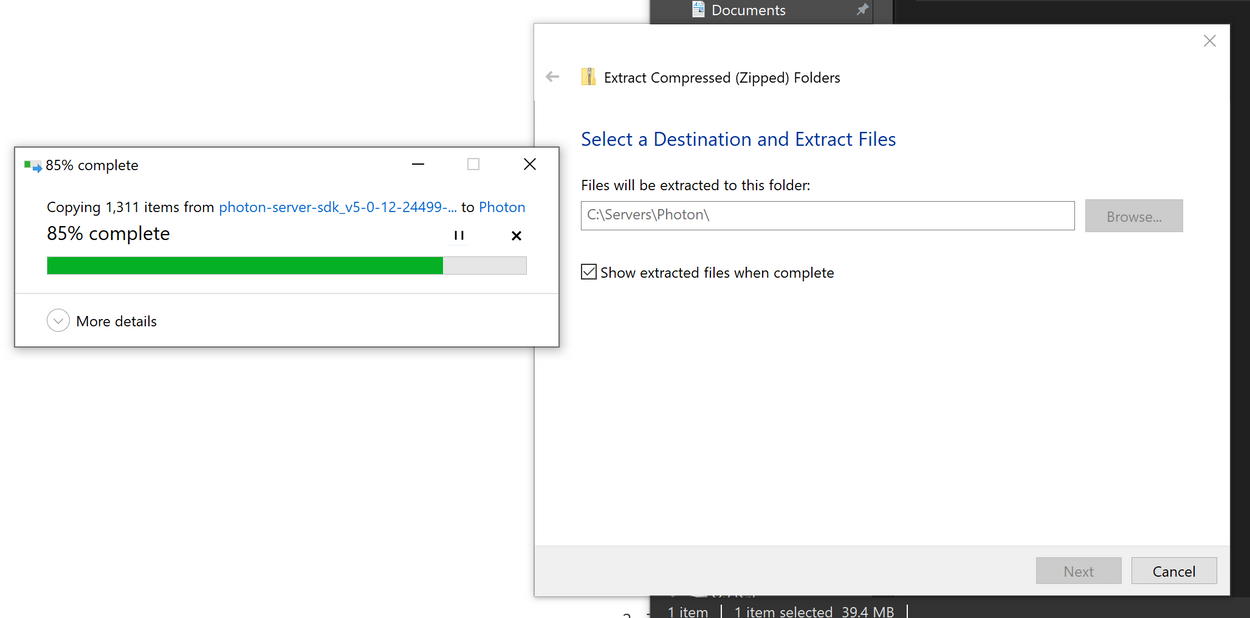
- Extract the content to any location, preferably an empty folder that you have prepared beforehand.
The extraction creates several folders:
- The Deploy folder contains the binaries. Find the PhotonControl.exe file in the bin_Win64 folder.
- Ignore the following folders that are for development:
- doc
- lib
- src-server (applications)
- For your convenience on the desktop, create a shortcut to the PhotonControl.exe file.
- From the desktop, launch this file with administrator rights.
A square white icon with a grey circle is displayed in the notification area of the taskbar: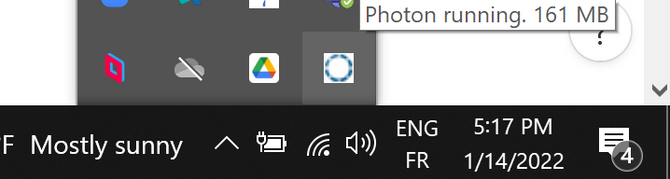
- Right-click the icon and select Get Free license.
- Download the license and place it in the bin_Win64 folder where you have extracted the archive.
- Right-click the icon, select Game Server IP Config, and define a local IP of your choice.
- Right-click the Exit Photon Control icon.
- Restart.
- Right-click the icon and select LoadBalancing (MyCloud) > Start as application.
The icon in the notification area of the taskbar is now blue.
To launch a collaborative session on two different computers on the same network, follow these steps:
- Start a collaboration session with a custom server.
- Enter the IP address that you have specified in the server configuration.
- Set the Description field to a server name of your choice.
Read more about the PhotonControl menu in the Photon documentation.
Troubleshooting
The button stays orange when you try to connect to your private server from Pixyz Review
The session isn't running. Perform these checks:
- The IP address is valid.
- The ports from this list have been accepted by your network administrator. PhotonControl normally opens the ports on its own.
- You started your server from the Start as application option before connecting to the server from Pixyz Review.
If it still doesn't work, then we invite you to refer to Photon's online documentation and contact them so they can unblock you.
Error messages in Pixyz Review
You may have tried to join a collaboration session that is not yet created.
Ensure the following:
- To create sessions, you use the Create Meeting tab and not the Join Meeting session.
- You share the same model with your collaborators.
Other errors
Share other errors with us.
Let us know if you get it right! We'd love to hear your feedback on your first collaborative experience.