Guided Import Parameters
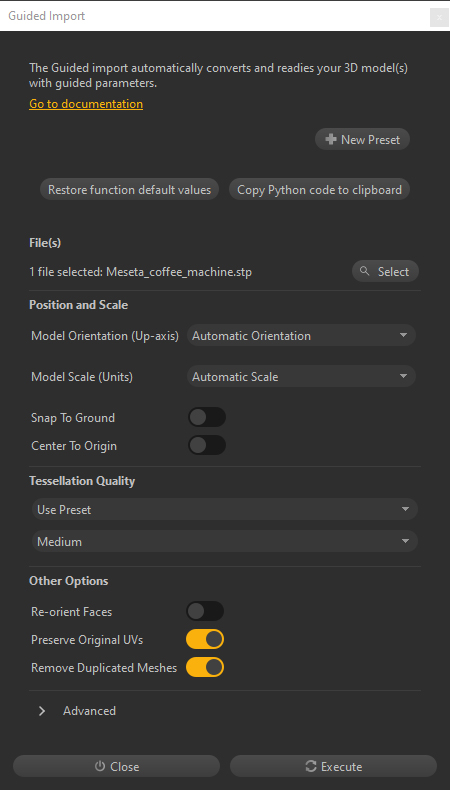
When using the Guided import to import files in Pixyz Studio, a dedicated window is opened, listing some parameters (or options), that modulate the import process depending on how they are set.
Find below more information for each parameter available.
TIP Each parameter description is directly available in tooltips: simply move the mouse over each parameter to display its dedicated tooltip
File(s)
The "File(s)" parameter is used to choose the list of file(s) to import. One or several files can be imported at once.
Importing multiple files at once with the Guided import
- When doing so, all files are first imported, and then processed all together. Importing them all at once allows the import process to be parallelized, in most cases (more efficient than importing one after the other)
- Importing multiple files at once is relevant when a 3D model is shattered in multiple files. This way the complete model will be processed as if it were combined in a single file, allowing for example the creation of continuous UVs, or the creation of instantiated parts when sub-parts are repeated inside the model, etc...
- Careful though when importing multiple at once models that have nothing to do with each other, as the Data Preparation will try to find some inexistent connection between them. In this regard, the Guided import is not a batching tool: it is only meant to help processing one model at a time as correctly as possible
- When importing multiple files, it is recommended to import one file format at a time (for example, only Catia files, or only FBX files)
Importing .pxz files or PointCloud files with the Guided import
- When importing a .pxz file through the Guided import, no automatic Data preparation process is run on it. It is only imported as a sub-file within the current scene. It is equivalent to importing it with the Raw import mode.
- Importing a PointCloud file (extensions .e57, .pts, .ptx, .rcs, .rcp) through the Guided import is equivalent to importing it with the Raw import mode: no automatic Data preparation process is run on it. To perform more optimization on a PointCloud, use the functions available in the Point Cloud Menu.
TIP Hover the mouse over the text "n files selected" to see the list of input files as a tooltip
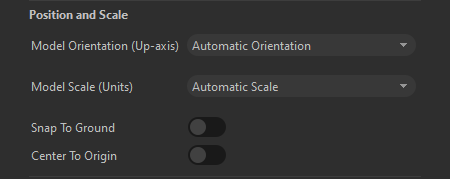
Position and Scale
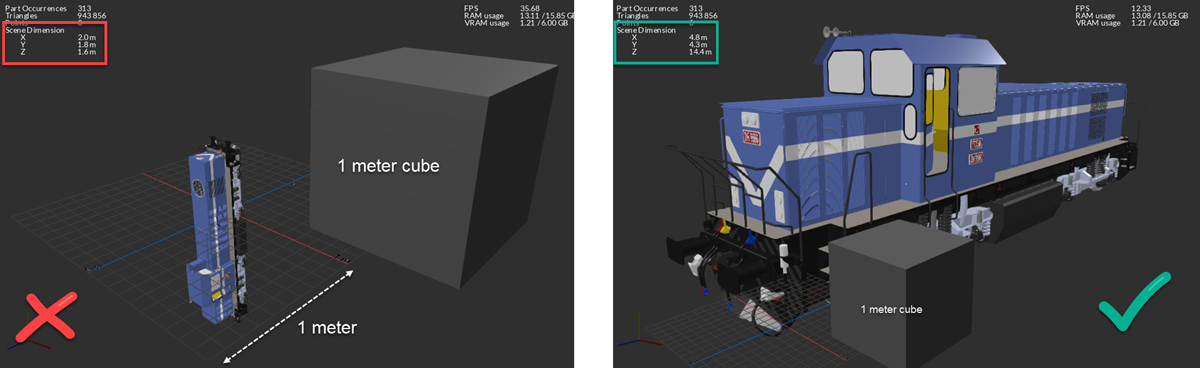
When importing a 3D model in Pixyz Studio, the goal is to a get model that has a correct absolute scale (e.g. a car should be a few meters long), and that is not tilted to the side, or mirrored.
In the below example, the train is only 1/10th of its correct size, and it is tilted: meaning its Coordinate system and units are not correctly matched with Studio's.
"Position and Scale" parameters help properly positioning, orienting and scaling the imported model, to match Pixyz Studio's own configuration:
- The coordinate system is right-handed, Y is the up-axis
- Units are millimeters (mm)
|
Parameter label |
Parameter description |
|
Model Orientation (Up-axis) |
Defines how the imported model's orientation (or Coordinate system) is evaluated, to be correctly converted to match Pixyz Studio's own system (right-handed, Y is the Up-axis). Possibles values:
|
|
Additional information:
|
|
|
Model scale (units) |
Defines how the imported model' scale and units are evaluated, to be correctly converted to match Pixyz Studio's own units (mm). Possibles values:
|
|
Snap to ground |
Automatically snaps/moves the imported model onto the ground of the scene (on the grid). This parameter changes the imported model's original position relatively to the origin, in the upward direction (Y-axis). |
|
Additional information:
|
|
|
Center to origin |
Automatically centers the imported model to the origin of the scene. This parameter changes the imported model's original position relatively to the origin, in all directions. |
|
Additional information:
|

Tessellation quality
Tessellation is the process of converting CAD models into meshes, usable by any 3D app.
See more information about this very important concept when it comes to obtaining a perfect mesh quality from CAD models in the About Tessellation section.
The Tessellation Quality can be set using 2 modes:
- Use preset: With "Use preset", the user chooses a preset to define the final mesh quality: Very High, High, Medium and Low.
The values used for each preset are the same as the ones used in the Tessellate function: see About Tessellation for more information - Use custom values: With "Use custom values", tessellation values can be set by the user, for the 3 tessellation parameters Max Sag, Max Length and Max Angle.
The
NOTE Note that the Tessellation process is ignored when importing files containing only meshes (polygonal or 3D printing models for example), or Point clouds: this Tessellation process does not affect or change them, nor does it extends the processing time.
Other options
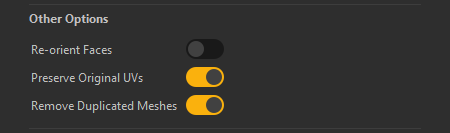
This section lists interesting optional parameters that can be enabled for more control at import:
|
Parameter label |
Parameter description |
|
Re-orient faces |
If enabled, Pixyz Studio tries to orient model's faces (normals) consistently so they face the proper direction. Do not use if the original's model faces orientation is already correct, as the process may destroy it. If the model is not 100% properly oriented after import, use the several functions from the Mesh Menu to fix faces orientation:
|
|
Preserve original UVs |
UVs applied to a mesh are used to properly display materials using texture maps. If "Preserve Original UVs" is enabled, Pixyz Studio imports the UVs included in the imported meshes (on any channel), and creates UVs on meshes that do not have any UVs (by a 400x400x400mm Bounding Box projection on channel 0, using UV Projection On Bounding Box). If the parameter is disabled, all UVs (from any channel) are destroyed and new ones are created (same BoundingBox projection). |
|
Remove duplicated meshes |
Use to remove duplicated/superimposed meshes (meaning multiple similar parts being superimposed). Do not use if the imported model includes different configurations of the same model, resulting in intentionally duplicated parts |

Advanced
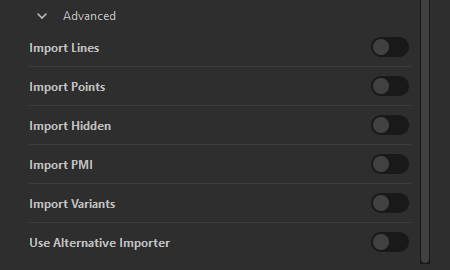
This section lists interesting optional advanced parameters that can be enabled for more control at import:
|
Parameter label |
Parameter description |
|
Import lines |
Use to import the lines (which can be CAD curves or polylines) included in the imported model, that are important to import and preserve |
|
Import points |
Use to import the points (which can be CAD point or free points, used as references for example) included in the imported model, that are important to import and preserve. No need to enable this parameter when importing Point clouds. |
|
Import hidden |
Use to import the parts that are originally hidden in the imported model. They are imported but not made visible though. |
|
Import PMI |
Use to import the PMI attached to the imported model (applicable for relevant CAD models only) |
|
Import variants |
Use to import the variants attached to the imported model (applicable for relevant CAD models only) |
|
Use alternative importer |
Some 3D/CAD formats handled by Pixyz Studio can be imported through 2 different importing technologies (or libraries). When one file/model is not properly imported, or not imported at all, using this parameter allows to test importing through an alternative importer and having a better luck (providing the format offers an alternative importer). |