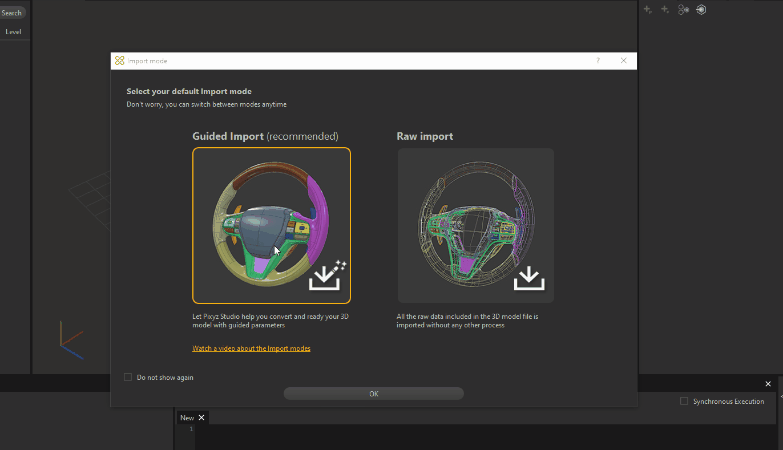
Import Mode
Importing a 3D/CAD file is generally the very first action to start working with Pixyz Studio, as importing, converting and optimizing a 3D model is the most common use case!
When opening Pixyz Studio for the first time, the user is asked to choose an Import mode preference.
The Import mode defines how a model is imported in Pixyz Studio, and 2 modes are available: Raw import and Guided import.
Raw import
"All the raw data included in the 3D model is simply imported without any other process"
The Raw import mode is basically the legacy mode: when a model is imported in Pixyz Studio, all the raw data included in the 3D model is simply imported without any other process.
The import options (like "Load Hidden" or "Import Animations") used with this import mode are the ones defined by the user prior to import, in Preferences (F9) > IO > Import.
Using this mode, the user has a full control over how the imported model will be data-prepared. In this regard, the Raw import mode is intended for advanced and legacy users, with a good knowledge of 3D model import and conversion, as well as a good knowledge of Pixyz Studio Data Preparation features and algorithms.
After importing the model, the user still needs to prepare it using all the features of Pixyz Studio, giving him/her more control.
Guided import
"Let Pixyz Studio help you convert and ready your 3D model with guided parameters"
Compared to the Raw import, the Guided import (which used to be the Wizard import in Pixyz Studio previous versions), is a simplified, guided method to import a 3D model in the scene.
In this regard, the Guided import mode is intended for novice users, that want to quickly convert any 3D model without requiring advanced Data Preparation knowledge.
But it is also convenient for advanced users that want to rely on Pixyz expertise, embedded in the Data Preparation recipe, or want to leverage the embedded features in order to gain time and productivity.
NOTE To learn more about the Guided import mode, and the Data Preparation recipe it embeds, please check out this page!
TIP To Pixyz Studio advanced users: please have a look at the new Guided import, as it might give you ideas about Data Preparation tips! A Python version of the Guided import scenario is available in the Sample Scripts
How To
Setting the preference
The "Import mode" window is displayed when opening Pixyz Studio for the first time, and will be displayed every time the software is launched until the "Do not show again" option is ticked.
To define your Import mode, simply click the dedicated picture, and click "OK".
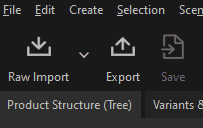
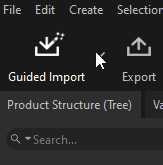
Depending on the Import mode chosen, the "Import" icon used in the main toolbar will be set to either Raw import or Guided import:
Changing the preference
The "Import mode" preference can be changed in 3 different ways:
- Every time Pixyz Studio is launched, the "Import mode" window will be displayed, allowing to modify the Import mode, until the "Do not show again" option is checked (go to Preferences (F9)` > Dialog and disable the "Hide Import Mode Dialog" preference to show it again at startup)
- To change the general preference for the "Import mode" set by the user at startup (without restarting Pixyz Studio to display the "Import mode" window again), 2 possibilities:
- Clicking the arrow on the right-side of the import icon in the Main Toolbar and choosing the mode:
- Going to Preferences (F9) > IO > Import > Import Mode, and change the mode with the drop-down list