Importing VRED Files
VRED models can be imported within Pixyz Studio, in order to optimize and re-use them in other virtual experiences.
Importing a *.vpb file in Pixyz Studio requires Autodesk VRED Pro or Design to be installed (with a valid license) on the same computer on which Pixyz Studio (or Pixyz Scenario Processor) is running.
NOTE Only geometries (meshes or BRep surfaces) and equivalent materials are directly imported inside Pixyz Studio' scene.
Configuring Pixyz Studio
To start importing *.vpb files in Pixyz Studio, the software needs to be configured first from the menu Preferences:
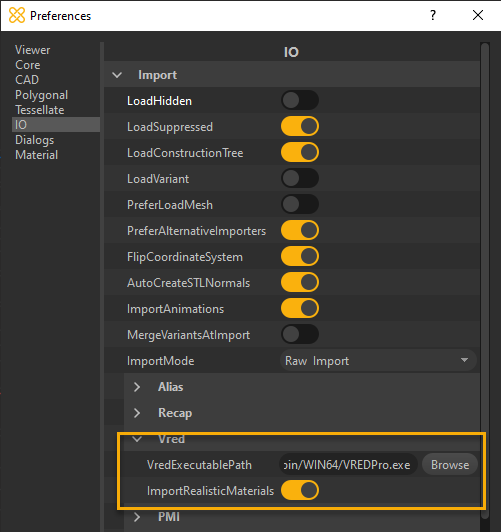
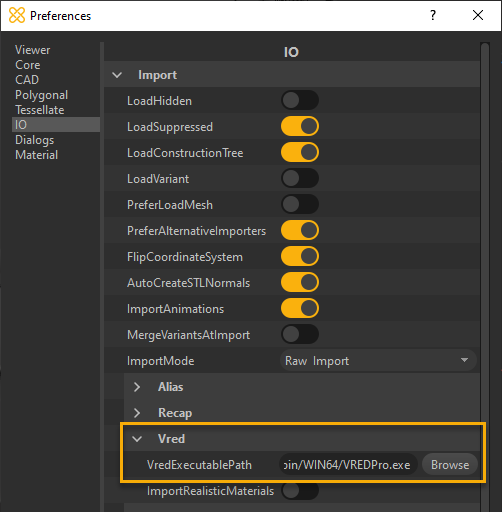
- Press F9 or go to Edit Menu > Preferences > IO > Import > Vred
- Fill the path in the VredExecutablePath field: browse to the VREDPro.exe file (most likely located in the bin/WIN64/ directory).
- You're all set !
If the path is not properly configured, Pixyz Studio (or Pixyz Scenario Processor) will prompt the following error message:

Configuring Pixyz Scenario Processor
To start importing *.vpb files using Pixyz Scenario Processor, the software needs to be initialized when executing a Python file.
Write at the beginning of your Python file the following command: core.setModuleProperty("IO", "VredExecutablePath", "Your VREDPro.exe file path")
Example: core.setModuleProperty("IO", "VredExecutablePath", "C:/Program Files/Autodesk/VREDPro-11.0/bin/WIN64/VREDPro.exe")
Importing a *.vpb file
PreferLoadMesh: False
If the *.vpb model contains NURBS data ( ), you can choose to import these by setting the preference setting IO/Import/PreferLoadMesh to False.
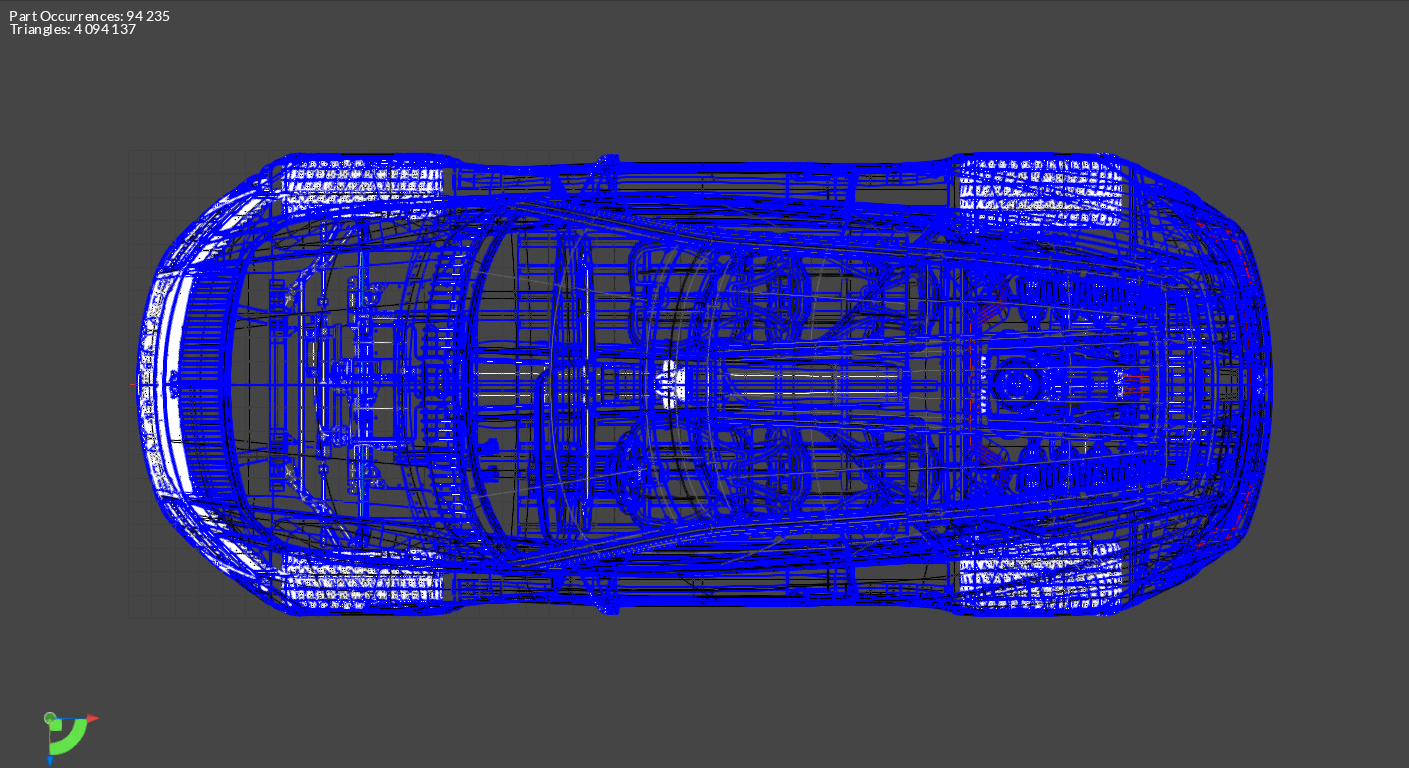
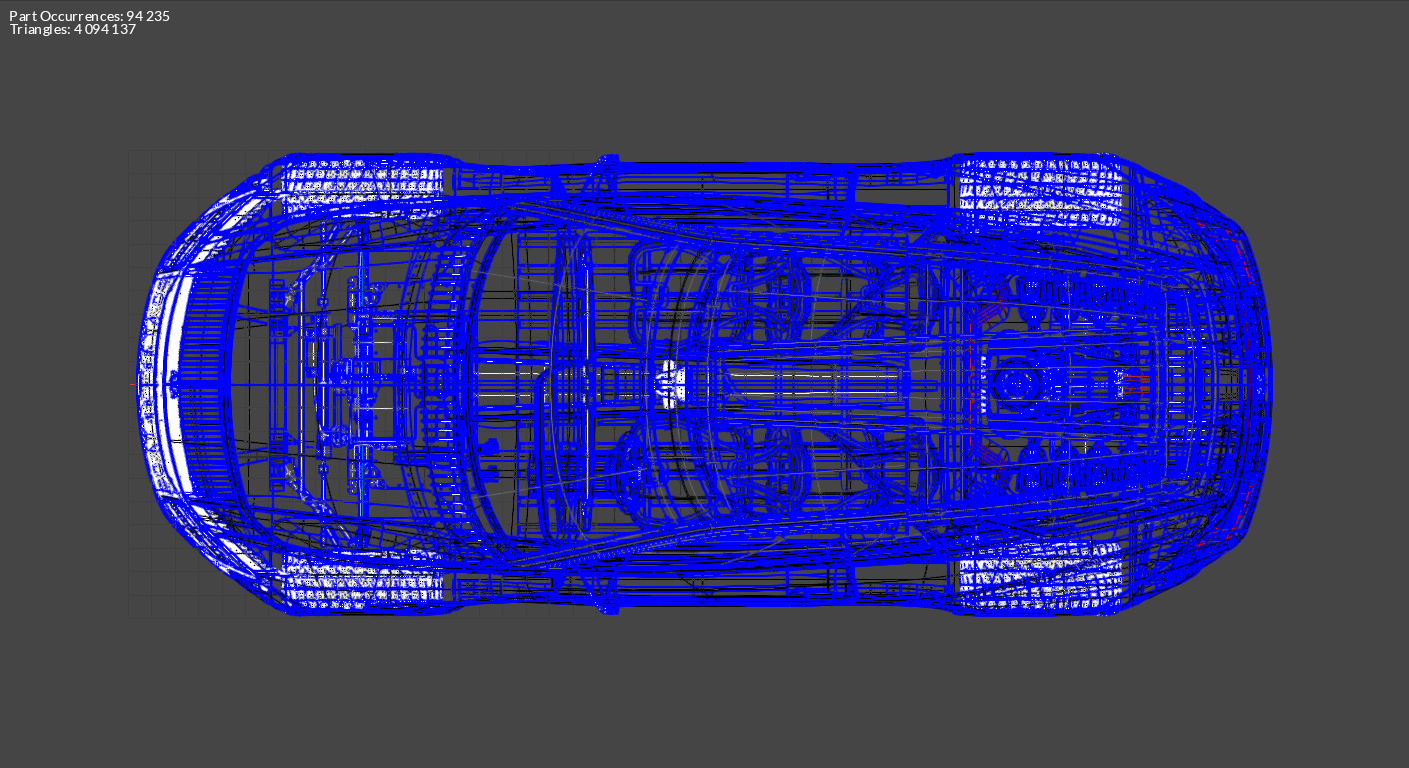
Because of how *.vpb files are formatted, all the surfaces will be divided in different occurrences. This will considerably increase the import time and the number of parts.
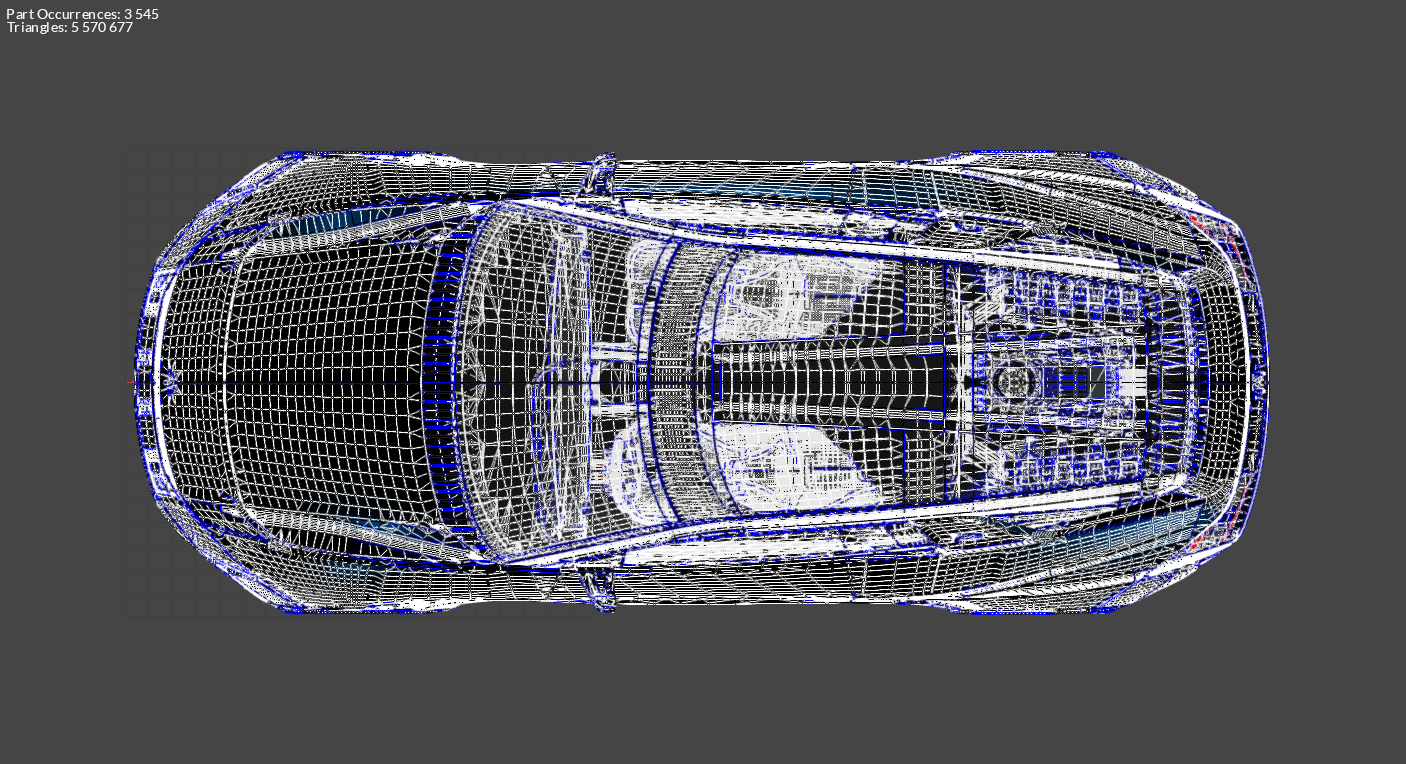
We strongly advise to use the Merge Final Level, followed by a Repair CAD (orient = False) functions after importing:
1. Importing (wireframe view): 94 235 parts, surfaces are not stitched together
2. MergeFinalLevel and RepairCAD: 3 545 parts and surfaces are stitched together
3. Tessellation: 5M triangles.
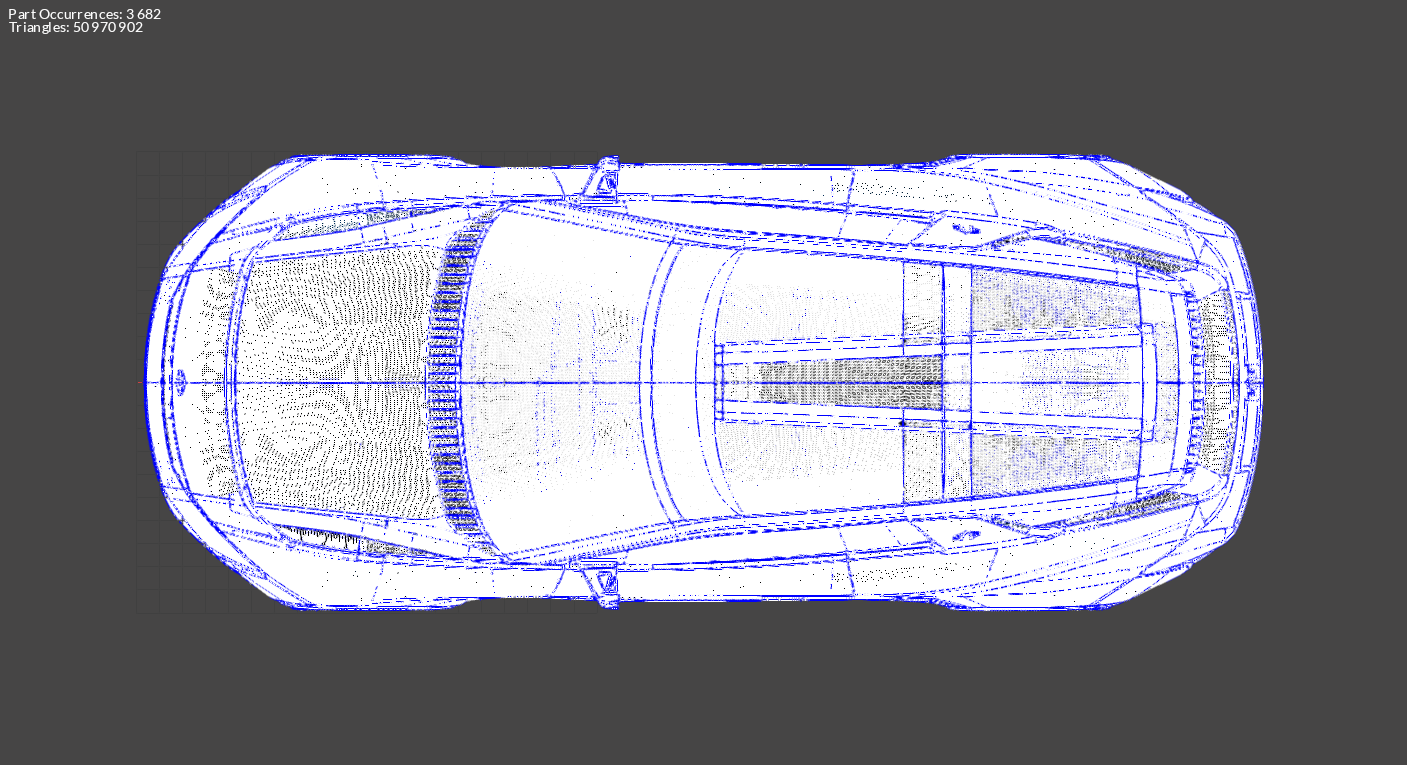
If the preference setting IO/Import/PreferLoadMesh is set to True, the mesh displayed in VRED will be imported (UVs and ambient occlusion are imported).
PreferLoadMesh: True
VRED Mesh: 50M triangles:
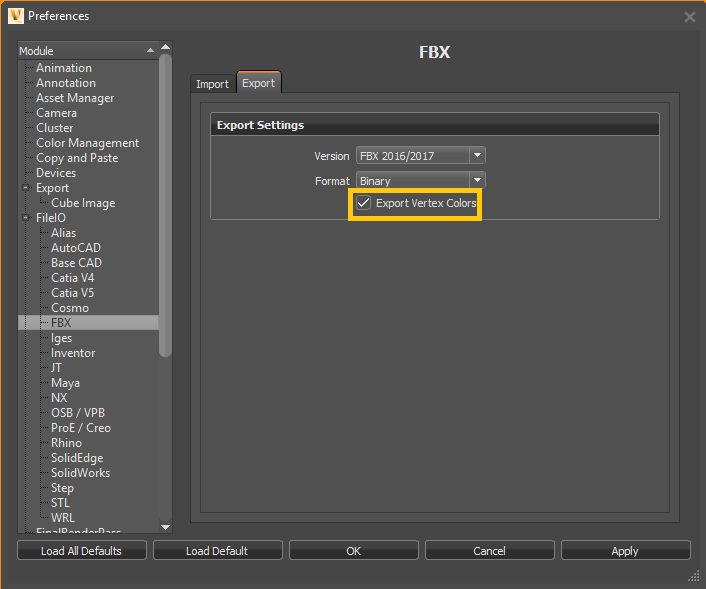
To import ambient occlusion as vertex colors, open Autodesk VRED and set ExportVertexColors to True in Preferences > FileIO > FBX > Export:
Importing Variants
If the preference setting IO/Import/LoadVariant is set to True, geometrical variants and material variants are imported:
- The custom property _PIXYZ_TRANSFORM_SWITCH_TAG is added to the switch occurrences
- The custom property <_PIXYZ_MATERIAL_SWITCH_TAG, *switch material name*> is added to occurrences having a material switch
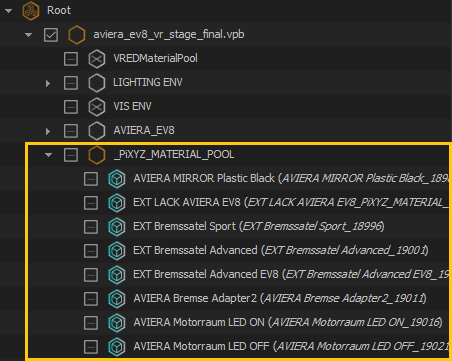
- Material variants can be retrieved in the material library or in the _Pixyz_MATERIAL_POOL occurrence in the Product Structure:
- More information regarding the imported *vpb materials and variants can be found in additional files (created at import). Their links are attached to the Root node as custom properties:

Importing animations
An *.fbx file containing information on the *.vpb animations is exported during the process (animations are preserved when importing a *.vpb file). The link is attached to the Root node as a custom property:

Importing Realistic materials
Properties of VRED shaders included in a *.vpb file can now be retrieved at import as "Custom Materials", by enabling the ImportRealisticMaterial parameter (Preferences (F9) > IO > Import > Vred)
Careful though! Importing these "Custom Materials" will not create a VRED-like shader/material, ready to display in Pixyz Studio. The purpose of keeping this information is for digital continuity.
For example if a user wants to recreate VRED-like shaders in an application, he can use the "Custom Materials" properties to do so.
Find an example with how this information can be used in Unity here (locked, please contact us!).